Things You Need Before Installing WordPress:
You will need to have a domain name and a good web hosting company that knows WordPress. We highly recommend that you use Bluehost because they will give you a free domain and 50% off their hosting plan (special for WPBeginner users). Bluehost is also an officially recommended hosting provider of WordPress.Since this is a very long and detailed tutorial, please use the navigation below to get to the appropriate section.
- How to Install WordPress using SimpleScripts
- How to Install WordPress using Softaculous
- How to Install WordPress using Fantastico
- How to Install WordPress using FTP
- How to Install WordPress in your Computer
How to Install WordPress using SimpleScripts
SimpleScripts allows web hosting companies to offer a one-click installer for WordPress. Bluehost is one of the many web hosting companies that offers 1-click installs of WordPress using SimpleScripts. To use SimpleScripts, your hosting company must have it installed in their servers. You will see it when you log into their control panel. Look for an icon like this:
In most web hosting companies, you will just see the SimpleScripts icon. The above screenshot is taken from the Bluehost cPanel which offers direct 1-click installs of WordPress. No matter which icon you click, you will be taken to SimpleScripts page like this:

When you click on WordPress, you will be prompted to a page with an install button. This is also the page where you would manage all your WordPress installs if you had any.

Once you click on the install button, you will be taken to a page to select your installation preference. You can choose the location where you want to install WordPress (i.e your main site or a sub directory). You will choose your blog title here (don’t worry you can always change it later). You also have the option to choose your user credentials (just click on the link that says Click here to show more).

Scroll down and accept the terms of service and hit complete. It will work behind the scenes to install your WordPress and once completed, you will receive a success page like this:

Use the login link that they gave you, and login using the username and password. You will see the WordPress dashboard which can be a little confusing at first. This is why we have created a free WordPress video tutorial series, so use it to your advantage. Most places are charging around $300+ for the same video training.
How to Install WordPress using Softaculous
Like SimpleScripts, Softaculous allow hosting companies to offer 1-click install for WordPress. InMotion Hosting is one of the many companies that are using Softaculous To use Softaculous to install WordPress, your hosting company must have it installed in their servers. When you log into your control panel, look for an icon like this: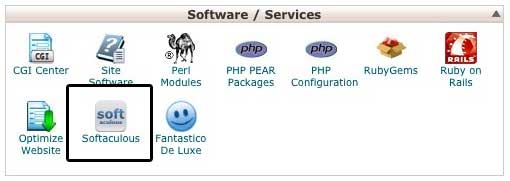
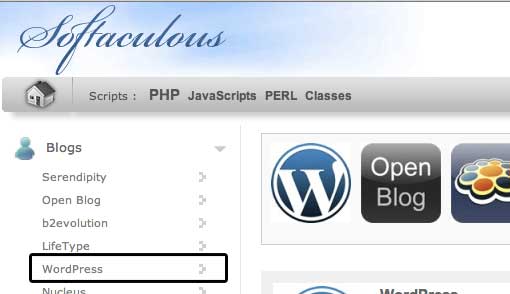
Upon clicking on the Softaculous icon, you will be redirected to the Softaculous dashboard. On the left hand side menu, you should see a list of software categories. Click on the “Blogs” category and then select WordPress.
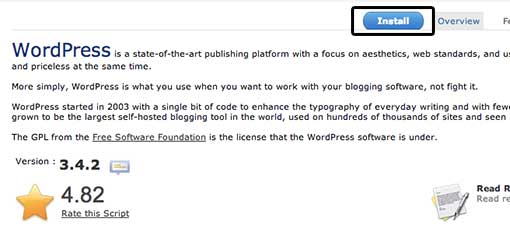
Now you will see a briefo verview of the software. Click on the big blue “install” button to start the process.
The install process will require you fill in some important information. First thing you need to do is choose the domain name you want to install WordPress on. After that select the directory you want WordPress in. If you want WordPress to be on your main domain, then you need to leave the “In Directory” field blank. Next, enter a database name for your WordPress installation (no one will see this, so you don’t have to be creative). Under the Database settings, you need to modify the table prefix to enhance your site security. We recommend that you change the default wp_ prefix to something like wp_y0urs1t3_
Then enter your site name description. Since this is a simple WordPress install, you sohuld leave the WPMU box unchecked unless you know what you are doing.
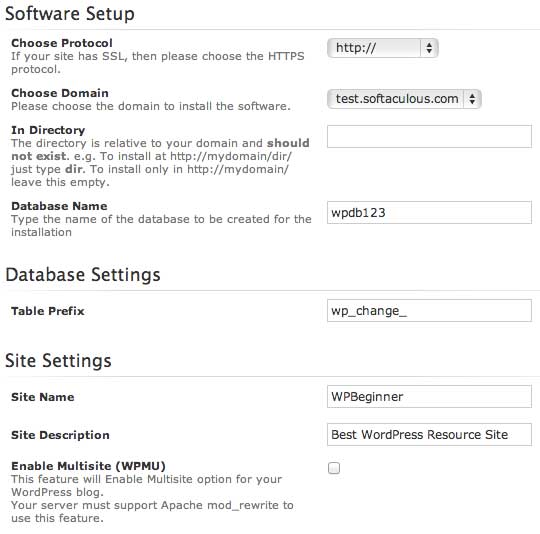
Further down the page, you will see the screen to create your WordPress administrator account. Please do not use the default “admin” username. Create something original for yourself. Also, don’t forget to create a strong password. Enter your best email and click on the install button.
Once you click the install button, within seconds WordPress will be installed and ready to go. All you need to do after that is go to yourdomain.com/admin/ and enter your login information to get into your WordPress dashboard. The WordPress dashboard can be confusing at once which is why we have created a free WordPress video tutorial series, so use it to your advantage. Most places are charging around $300+ for the same WordPress training.
How to Install WordPress using Fantastico
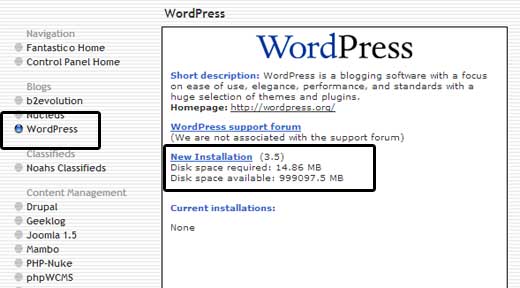
Fantastico is a very popular script installing service that is bundled with most cPanel web hosting like HostGator and others. For sometime, Fantastico was the elite script installer that users cherished however now there are many competitors like SimpleScripts and Softaculous. If your hosting company has Fantastico, then this is how you can use it to install WordPress.Login to your control panel and look for an icon like this:

Click on the icon, and you will be redirected to the Fantastico control panel. On the left hand side menu, you will see WordPress under the Blogs section. Click on it, and it will show you the WordPress information screen. To install WordPress using fantastico, click on the “New Installation” link.
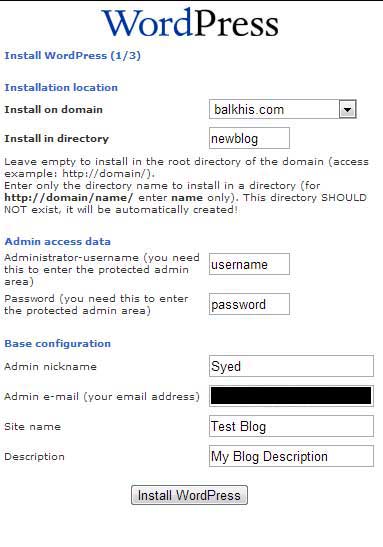
Select which domain you want to install WordPress on. Next, enter the directory name if you don’t want the blog to be on the main domain. If you want the blog to be on the main domain, then leave this field blank. Under the admin access data, enter the username and password that you would like to use to access your WordPress dashboard. Make sure that your username is NOT admin and that you use a strong password. Enter your admin nickname and a valid email address. Enter a site title and description (don’t worry, you can modify this later if you don’t like it). Once you have entered all the information, click on the Install WordPress button.
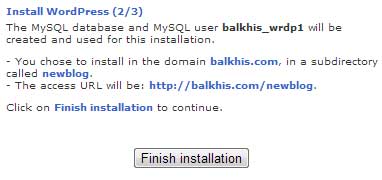
The next page will ask you to confirm all the information that you have entered. Click on the Finish installation button to complete your WordPress install.
After this step, your WordPress install is complete. Go to yourdomain.com/admin/ and enter your login information to get into your WordPress dashboard. We know that the WordPress dashboard can be confusing which is why we have created a free WordPress video tutorial series, so use it to your advantage. Most places are charging about $300+ for the same WordPress training.
How to Install WordPress using FTP
To install WordPress using FTP, you need to have a FTP software (Read our tutorial on how to use FTP).First thing you need to do is download the latest version of WordPress. Unzip the file, and use the FTP software to upload the files into your web host directory of your choice.
If you want to install WordPress in the main domain, then you want to install it in your /public_html/ directory. If you want it in a subfolder, then upload it in a folder /public_html/foldername/
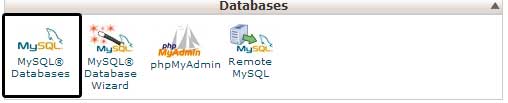
Once you are done uploading WordPress, go to your hosting control panel to create a database. We are using cPanel web hosting, so our screenshots will be of cPanel. In your cPanel, find the icon like this:
You will see a field to create a new database. Enter your database name, and click “Create Database”

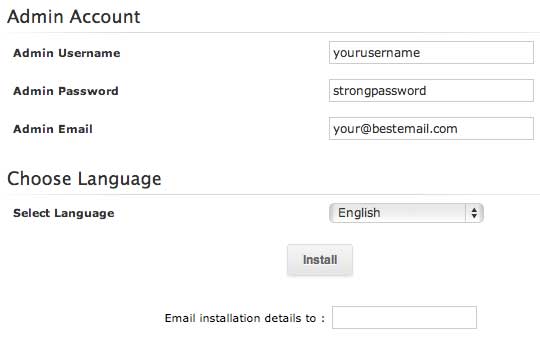
Now that you have created your database, it is time to run the install. Go to the URL where you uploaded WordPress. If it is in the main domain, then you will simply go to yoursite.com.
You will see a page like this:

Click on the button to create the configuration page. The next screen will show you the information you need to have (database name, database username and password, database host, and table prefix). Simply click on the Let’s go button. Next you will see the form to enter all the information.

Once you enter the information, click on the submit button. It will take you the page that has the button to Run the Install. Click on it.

On the next screen, you will see the form to enter your website’s information. This information would be your site’s title, your username, password, and email.

Click Install WordPress, and you are golden. On the next screen, you will see the Success note with your username and password. Click on the login button and start writing. If you need help learning the WordPress dashboard, then check out our free WordPress video tutorial series.
How to Install WordPress in your Computer
Often beginners ask us the question, if they could install WordPress in their computers first. The correct answer to that question is YES, you can install WordPress in your computers however most beginners should not. The reason why most folks install WordPress in a local server environment is to build themes, plugins, or to test things out. If you want to run a blog for other people to see, then you do not install WordPress in your computer. IF you install WordPress locally in your computer, then the only person who can see the site is you. To make your WordPress site available to the internet (rest of the world), then your you need to get a web hosting account and install WordPress by using one of the four methods we showed above.Having that said, if you are really interested in install WordPress locally in your computer to learn more about theme development, test plugins etc, then we highly encourage you to do so.
If you are using a Windows computer, then we recommend that you download & setup WAMP. If you are using a Mac, then you need to download and setup Mamp.
We have created a set of videos for each type of OS that will guide you on how to install WordPress. Although these videos are a bit old, but the general concept still stays the same. Watch the videos on how to install WordPress on a local server environment.
Tidak ada komentar:
Posting Komentar